Showing posts with label Fancy Folds. Show all posts

Monday, November 13, 2017

CAS MONDAY, Be Merry Z-Fold Card...

It's Monday and that means it's time for another CAS card.  Although I'm not sure this technically counts since it's a fun fold, but it is definitely a very easy card to make.  This card is taken from a swap card from Kathy Winters, a sideline demonstrator friend.  I don't CASE very often, but I decided this Z-Fold card would be perfect for one of my Christmas Stamp-a-Stack classes!


Both the stamp set and designer series paper are from the Annual Catalog, so they are a good choice for Christmas card making all year long.  I try to make some every month, so that I don't have to make 100+ at the last minute!

BE MERRY Z-FOLD CARD SUPPLIES:
  • Stamp Sets – Merry Mistletoe (W #143650 $27.00, C #143655 $19.00)
  • Card Stock –  
    • Cherry Cobbler 5-½ ” x 8-½” Card Base score @ 2-⅛” and 4-¼” in the landscape position
    • Cherry Cobbler  3” x 3“  (2)
    • Whisper White 2-¾” x 2-¾”
    • Be Merry DSP 1-⅞” x  5-¼”
    • Be Merry DSP 4” x 5-¼”
  • Ink – Cherry Cobbler, Garden Green
  • Ribbon – Mini Tinsel Trim Ribbon (#144636, $9.00)

    LOYALTY REWARDS - When you purchase $50 or more, you qualify for my Loyalty Rewards program!  This Frequent Stamper program is my way of saying "thank you" to my returning customers in appreciation of their business and is in addition to other Stampin' Rewards.  Earn FREE stamps with MarieStamps.com!

    Thursday, November 19, 2015

    EVERY CLOUD HAS A SILVER LINING CORNER FLIP FOLD...

    Saturday, I have my downline meeting and I will be doing a demonstration of the Corner Flip Fancy Fold.  Originally, I had planned to use my Sprinkles of Spring card for the presentation and my swap card.  However, one of my sidelines stole my original card right off the swap boards at the OnStage event (bad, Sarah!), so I came up with this version to keep her from having a duplicate.  Aren't I nice???  I used the same sketch/template though, so not too much reinvention.

    For this version, I made it more of a generic card that could be used for several occasions: Get Well, Thinking of You, Encouragement, etc.  It is difficult to see in the photo, but I did sponge Pool Party on the background of the Whisper White for the sky.  I needed a bit of whimsy though with my rainbow colored raindrops!  Enjoy!


    EVERY CLOUD HAS A SILVER LINING CORNER FLIP CARD SUPPLIES:
    • Stamp Sets – Sprinkles of Life (P#139971, $21.00), Over the Rainbow (P#138770, $21.00)
    • Card Stock – Watermelon Wonder, Bermuda Bay, Crushed Curry, Pool Party, Whisper White, Cherry on Top Designer Series Paper Stack (#138443, $8.00)
    • Ink – Crushed Curry, Pool Party
    • Ribbon – Bermuda Bay Thick Baker's Twine (#138413, $3.50),
    • Punches – Tree Builder (#138295, $18.00), Banner Triple (#138292, $23.00)
    • Accessories – Silver Embossing Powder (#109131, $5.00),  Fine-Tip Glue Pen (#138309, $7.00), Stampin' Dimensionals (#104430, $4.00), Mini Glue Dots (#103683, $5.25)
    • Tools – Stampin' Trimmer (#126889, $30.00), Sponge Daubers (#133773, $5.00)

    LOYALTY REWARDS - When you purchase $50 or more, you qualify for my Loyalty Rewards program!  This Frequent Stamper program is my way of saying "thank you" to my returning customers in appreciation of their business and is in addition to other Stampin' Rewards.  Earn FREE stamps with MarieStamps.com!

    Thursday, November 12, 2015

    SPRINKLES OF SPRING CORNER FLIP CARD...

    I'm headed off to Baltimore in the morning for the OnStage Local Event!  I'm so excited!!!  Before I head out, I wanted to share the second of my swap cards I did--this time for a SUDSOL group swap at the event.  For this swap, we try to step it up a bit, so I wanted to do a fancy fold.  I chose the Corner Flip Fold.  No time to do a picture tutorial since I'm leaving, but there are general directions following the card supplies list.


    I wanted to use a Thinking of You theme as I will use this swap for my downline meeting next week as well, but there wasn't an appropriate sentiment in the Sprinkles of Life stamp set, so I borrowed one from the Sheltering Tree set.  I decided to use some *happy* colors - looking forward to the Spring already!  Too soon???  Here is a view as you open it and then the inside:


    SPRINKLES OF SPRING CORNER FLIP CARD SUPPLIES:
    • Stamp Sets – Sprinkles of Life (P#139971, $21.00), Sheltering Tree (P#137163, $25.00)
    • Card Stock – Watermelon Wonder, Bermuda Bay, Crushed Curry, Pear Pizzazz, Whisper White, Cherry on Top Designer Series Paper Stack (#138443, $8.00)
    • Ink – Watermelon Wonder, Bermuda Bay, Crushed Curry, Cucumber Crush, Chocolate Chip, Basic Black
    • Ribbon – Bermuda Bay Thick Baker's Twine (#138413, $3.50),
    • Punches – Tree Builder (#138295, $18.00), Banner Triple (#138292, $23.00)
    • Accessories – Dazzling Diamonds Stampin' Glitter (#133751, $5.00), Fine-Tip Glue Pen (#138309, $7.00), Stampin' Dimensionals (#104430, $4.00)
    • Tools – Stampin' Trimmer (#126889, $30.00)
    CORNER FLIP FUN/FANCY FOLD DIRECTIONS:
    1. Cut card stock for regular A2 card base (4-1/4” x 5-1/2”).   Score in the landscape position at 4-1/4”. 
    2. Place the card base in the Stampin’ Trimmer in the landscape position, aligning the left edge at 3”. 
    3. Cut FROM 2-1/2” to 4-7/8” (using the numbers on the slider). 
    4. Rotate your card stock 90 degrees (to the right). 
    5. Again align the left edge of the card stock at 3”.  Cut FROM 3” (should meet the previous cut) to 5/8”. 
    6. Fold your card base on the score line. 
    7. Push the lower left corner of the cut square inward while pulling the upper right hand corner towards you -- down and towards the opposite corner.  Gently ease the folds so that everything lines up square.  Use your bone folder to sharpen the crease. 
    8. Dress up the front square with a 2-3/4” square mat and a 2-1/2” square focal piece. 
    9. For the inside use a complimentary color mat (this will show from the card front) of 4” x 5-1/4”.  For your inside sentiment focal piece, you want to use a small enough piece that it will not show from the front.  I use 2-7/8” x 4-1/8” or less.

    LOYALTY REWARDS - When you purchase $50 or more, you qualify for my Loyalty Rewards program!  This Frequent Stamper program is my way of saying "thank you" to my returning customers in appreciation of their business and is in addition to other Stampin' Rewards.  Earn FREE stamps with MarieStamps.com!

    Thursday, August 1, 2013

    YOU'LL "FLIP" OVER OUR NEW THINLIT CARD DIES!...


    They've been called flip cards, flip flop cards, swing cards, and more-but they have always been a bit tricky to create.  Not anymore!  Our amazing new Thinlits™ Card Dies cut and score to create a card that flips in just one step.  These new card dies come with extra die pieces that have versatile designs, so you can use them on other projects, not just for flip cards.  Available beginning today!

    The Label Card Thinlits Die comes with nine total pieces.  It coordinates with:
    • Happy Day Stamp Set (W#130294, C#130297)

    The Circle Card Thinlits Die comes with 10 total pieces.  It coordinates with:
    • Worth the Wait Stamp (W#131091)
    • Five-Way Flower Stamp (W#131088)
    Card base: Unfolded: 6"x 5-1/2" | Folded: 4-1/4" x 5-1/2"


    ITEM  PRICE   DESCRIPTION
     133479   $32.95  Label Card Thinlits Die
     133480  $32.95  Circle Card Thinlits Die

    Both card dies pair well with:
    • Oh, Hello Stamp Set (W#131931, C#130733 ) 
    • Yippee-Skippee! Stamp Set (W#131341, C#131344 ) 
    • Really Good Greetings Stamp Set (W#130330, C#130333 )
    • Regarding Dahlias Stamp Set (W#130324, C#130327 ) 
    Check out this video which shows you how they work and gives you several great project ideas as well!


    LOYALTY REWARDS - When you purchase $50 or more, you qualify for my Loyalty Rewards program!  This Frequent Stamper program is my way of saying "thank you" to my returning customers in appreciation of their business and is in addition to other Stampin' Rewards.  Earn FREE stamps with MarieStamps.com!

    Thursday, December 6, 2012

    25 DAYS OF CHRISTMAS, DAY #16: Twisted Fancy Fold Peeking Penguin Card...

    Today's 25 Days of Christmas project is a TWISTED one!  This fancy fold makes such a fun and eye-catching card!  It is a bit tricky at first, but once you do one, they will come quite easily and you will be HOOKED!!!  There is a FREE tutorial following the supply list.  I hope you enjoy it!


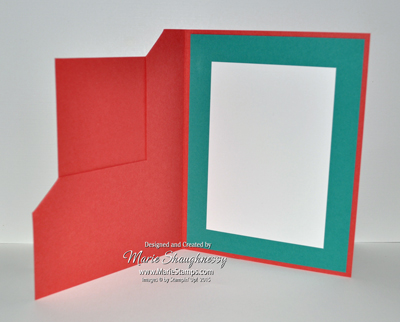
    Here is the card open.  I LOVE the pockets on them!  At this time of year, they are perfect for holding gift cards!


    TWISTED PEEKING PENGUIN SUPPLIES:
    • Stamp Sets – No Peeking (W#126290 $24.95, C#126292 $17.95)
    • Card Stock – Cherry Cobbler, Gumball Green, Be of Good Cheer DSP, Red Glimmer Paper (#121790, $4.95)
    • Ink – Basic Black, Gumball Green, Cherry Cobbler, Pacific Point, Chocolate Chip, Early Espresso, Blush Blossom, Pumpkin Pie Stampin' Write Markers
    • Ribbon – Cherry Cobbler 1/2" Seam Binding (#120992, $6.95)
    • Punches – l-3/4" Circle (#119850, $16.95),  2-3/8" Scallop Circle (#118874, $16.95)
    • Tools – Simply Scored Scoring Tool (#122334, $29.95), Big Shot, Delicate Doilies Sizzlits (#126999, #21.95), Circles #2 Die (#114526, $15.95), Finishing Touches Edgelits (#127010, $9.95), Stampin' Dimensionals (#104430, $3.95) 
    TWISTED FANCY FOLD DIRECTIONS:

    1.  Cut your base card stock to 4-1/4" x 11".

    2.  Score diagonally using the Simply Scored by placing each two diagonally opposite corners on the same score line and scoring as see at the right.  I have added lines to the photos so you can see the score lines better.  Tip: Run your stylus down from the 6” score line and hold it there while placing your paper.  This way you will know you have the correct score line all the way down.

    3.  Fold card along the long diagonal score line.  Your bottom should fold up towards the top so it looks as pictured.  Otherwise your pockets will be on the WRONG sides.
    4.  Place the folded base on your Simply Scored with the long straight fold on the top.  I lined mine up to have the 6” mark be the center of the length.  Score down the center.

    5.  Bring the two 4" ends together by folding along the second score line to form your Twisted card base.
    6.  To use one DSP that has two sides you would like for your design:  Cut your DSP to 3-3/4” x 10-1/2”.  Cut the piece diagonally from corner to corner as you scored the card base.
    7.  Layer the DSP pieces as if you were folding it on the cut line and line up the center on the 6” score line and score.  Your BOTTOM triangle DSP should be on the TOP right as my Gumball Green is.

    8.  Cut each piece on the score line. You will now have 4 pieces that will fit your triangular areas almost perfectly while allowing a border of card stock to show. I added a small Finishing Touches border to cover a tiny area that isn’t covered. See finished card at the top.
    9.  If designing your card front with two different DSP sheets or to make it a bit easier on yourself:  
    For your TOP triangle, cut one piece of DSP to 4" x 4-1/4".  Then cut it in half diagonally.
    For the BOTTOM triangle, cut a 2" x 5-1/2" piece of DSP. Cut this in half diagonally as well.

    10. If you using an edgelit design inside the top of your pocket as I did, cut a strip about ¾” x 8”. Cut with the Finishing Touches Edgelit. You will have excess cardstock to trim away. I shaped the ends to round out the last loop on each end and then trimmed them down to fit inside the pockets as shown. Dry fit before adhering.

    11. Assemble your card and decorate as desired. You can leave the pockets open or adhere closed. I adhered my front pocket shut. The pockets are perfect to tuck things in. The inside pocket is perfect for a gift card, a bookmark, a tag and so much more!  See above open photo.

    LOYALTY REWARDS - When you purchase $50 or more, you qualify for my Loyalty Rewards program!  This Frequent Stamper program is my way of saying "thank you" to my returning customers in appreciation of their business and is in addition to other Stampin' Rewards.  Earn FREE stamps with MarieStamps.com!

    Wednesday, December 5, 2012

    25 DAYS OF CHRISTMAS, DAY #15: Tea Bag Fold Christmas Tree Card...

    Today's 25 Days of Christmas project is a CASE of previous Tea Bag Fold Tree cards (Scallop Christmas Tree Fold and Tea Bag Fold Tree) I have done with a little bit of a twist.  There are many different Tea Bag Fold variations.  This time I used one that is often used for origami layered stars, but I adapted it for a tree.  What I like about this one is that the front flap is one smooth piece instead of two flaps that some may have trouble getting to come together evenly.  Although I do still like the traditional one, too!  It also gives you a chance to see the Designer Series Paper better - which is a plus with this Be of Good Cheer DSP - the little red circles look like ornaments!

    There is a FREE tutorial for the Tea Bag Fold Christmas Tree following the supply list.  Enjoy!


    TEA BAG FOLD CHRISTMAS TREE SUPPLIES:
    • Stamp Sets – Mixed Medley (Hostess Only W#128054 $14, C#128057 $10)
    • Card Stock – Gumball Green, Cherry Cobbler, Early Espresso, Be of Good Cheer DSP, Champagne Glimmer Paper (#127885, $4.95)
    • Ink – Cherry Cobbler, Gumball Green, Champagne Mist Shimmer Paint (#116806, $5.95) for Champagne Shimmer Mist
    • Ribbon – Gumball Green 3/8" Stitched Satin (#126848, $8.95), Cherry Cobbler Baker's Twine (#123125, $2.95)
    • Punches – l-1/4" Scallop Circle (#127811, $15.95), 3/4" Circle (#119873, $12.95), Merry Minis Punch Pack (#126882, $16.95)
    • Tools – Big Shot, Petals-a-Plenty Embossing Folder (#116824, $7.95), Stampin' Dimensionals (#104430, $3.95) 
    TEA BAG FOLD CHRISTMAS TREE DIRECTIONS:
    1. Cut four DSP squares measuring 3", 2-1/2", 2" and 1-1/2". 
    2. With right side down, fold paper diagonally corner to corner both ways unfolding after each fold.
    3. Then, fold in half both ways. Use a bone folder when folding for crisp creases. Unfold.  Your square should now look like diagram #1.
    4. Fold square in half as in diagram #2.  Grasp the left and right sides and push them down and inward toward the center.   When finished, your square will look like diagram #3 and when viewed from the top, it should resemble an "X".
    5. Pull the front left flap to the center as shown in diagram #4.
    6. Flatten the flap to form a kite shape as seen in diagram #5.  Be sure your bottom tip is directly under the peak of the triangle.  Flip over and repeat for the flap on the opposite side
    7. Repeat for all 4 squares. Adhere to your card beginning with the smallest.  Place the next tip inside the bottom of the previous one until all are done (diagram #6).  

    LOYALTY REWARDS - When you purchase $50 or more, you qualify for my Loyalty Rewards program!  This Frequent Stamper program is my way of saying "thank you" to my returning customers in appreciation of their business and is in addition to other Stampin' Rewards.  Earn FREE stamps with MarieStamps.com!

    Saturday, December 1, 2012

    25 DAYS OF CHRISTMAS, DAY #12: Swingin' Evergreen Half-Cut Z Fold Card...

    Today's 25 Days of Christmas project is a Half Cut Z Fold.  I went with a very simple design for this card as it was a class project and I was emphasizing learning a new fancy fold rather than the card itself.  But it does feature the beautiful Evergreen Stamp Set from the Holiday Catalog.  This set is perfect for two-step stamping and easy enough that you can get away with not using a Stamp-a-ma-jig if you want. 


    When you open the card, the front focal image swings to the inside, so that it is seen with the card in the open position.   I stamped the tree shaped sentiment high enough to leave room for a signature underneath.


    This photo shows a side view to see where the Label is half-cut.


    There is no tutorial for this one as it was a class project for attendees only.  However, it is very similar to a card I did over 3 years ago, Half Cut Fold Card with a few tweaks including using a framelit instead of a punch window and changing the swing portion so that the front panel is not cut out.  Same principal though.  Enjoy! 

    SWINGIN' EVERGREEN HALF-CUT Z FOLD CARD SUPPLIES:
    • Stamp Sets – Evergreen (W#127970 $25.95, C#127973 $18.95)
    • Card Stock – Always Artichoke, Very Vanilla, Champagne Glimmer Paper (#127885, $4.95)
    • Ink – River Rock, Raspberry Ripple, Always Artichoke, So Saffron
    • Ribbon – Raspberry Ripple 3/8" Stitched Satin (#126845, $8.95)
    • Tools – Big Shot, Labels Collection Framelits (#125598, $26.95), Petals-a-Plenty Embossing Folder (#116824, $7.95), Stampin' Dimensionals (#104430, $3.95)
    LOYALTY REWARDS - When you purchase $50 or more, you qualify for my Loyalty Rewards program!  This Frequent Stamper program is my way of saying "thank you" to my returning customers in appreciation of their business and is in addition to other Stampin' Rewards.  Earn FREE stamps with MarieStamps.com!

    Related Posts with Thumbnails