


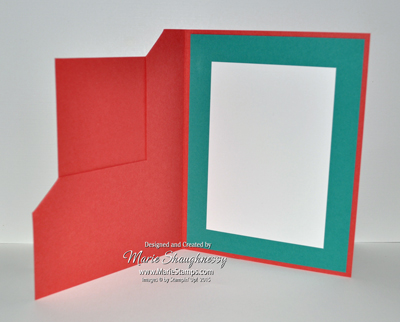
I wanted to use a Thinking of You theme as I will use this swap for my downline meeting next week as well, but there wasn't an appropriate sentiment in the Sprinkles of Life stamp set, so I borrowed one from the Sheltering Tree set. I decided to use some *happy* colors - looking forward to the Spring already! Too soon??? Here is a view as you open it and then the inside:

SPRINKLES OF SPRING CORNER FLIP CARD SUPPLIES:
- Stamp Sets – Sprinkles of Life (P#139971, $21.00), Sheltering Tree (P#137163, $25.00)
- Card Stock – Watermelon Wonder, Bermuda Bay, Crushed Curry, Pear Pizzazz, Whisper White, Cherry on Top Designer Series Paper Stack (#138443, $8.00)
- Ink – Watermelon Wonder, Bermuda Bay, Crushed Curry, Cucumber Crush, Chocolate Chip, Basic Black
- Ribbon – Bermuda Bay Thick Baker's Twine (#138413, $3.50),
- Punches – Tree Builder (#138295, $18.00), Banner Triple (#138292, $23.00)
- Accessories – Dazzling Diamonds Stampin' Glitter (#133751, $5.00), Fine-Tip Glue Pen (#138309, $7.00), Stampin' Dimensionals (#104430, $4.00)
- Tools – Stampin' Trimmer (#126889, $30.00)
- Cut card stock for regular A2 card base (4-1/4” x 5-1/2”). Score in the landscape position at 4-1/4”.
- Place the card base in the Stampin’ Trimmer in the landscape position, aligning the left edge at 3”.
- Cut FROM 2-1/2” to 4-7/8” (using the numbers on the slider).
- Rotate your card stock 90 degrees (to the right).
- Again align the left edge of the card stock at 3”. Cut FROM 3” (should meet the previous cut) to 5/8”.
- Fold your card base on the score line.
- Push the lower left corner of the cut square inward while pulling the upper right hand corner towards you -- down and towards the opposite corner. Gently ease the folds so that everything lines up square. Use your bone folder to sharpen the crease.
- Dress up the front square with a 2-3/4” square mat and a 2-1/2” square focal piece.
- For the inside use a complimentary color mat (this will show from the card front) of 4” x 5-1/4”. For your inside sentiment focal piece, you want to use a small enough piece that it will not show from the front. I use 2-7/8” x 4-1/8” or less.


No comments:
Post a Comment
Thank you for blessing me with your comments! I truly appreciate each and every one. Have a fabulous day!